Creating Automation Task
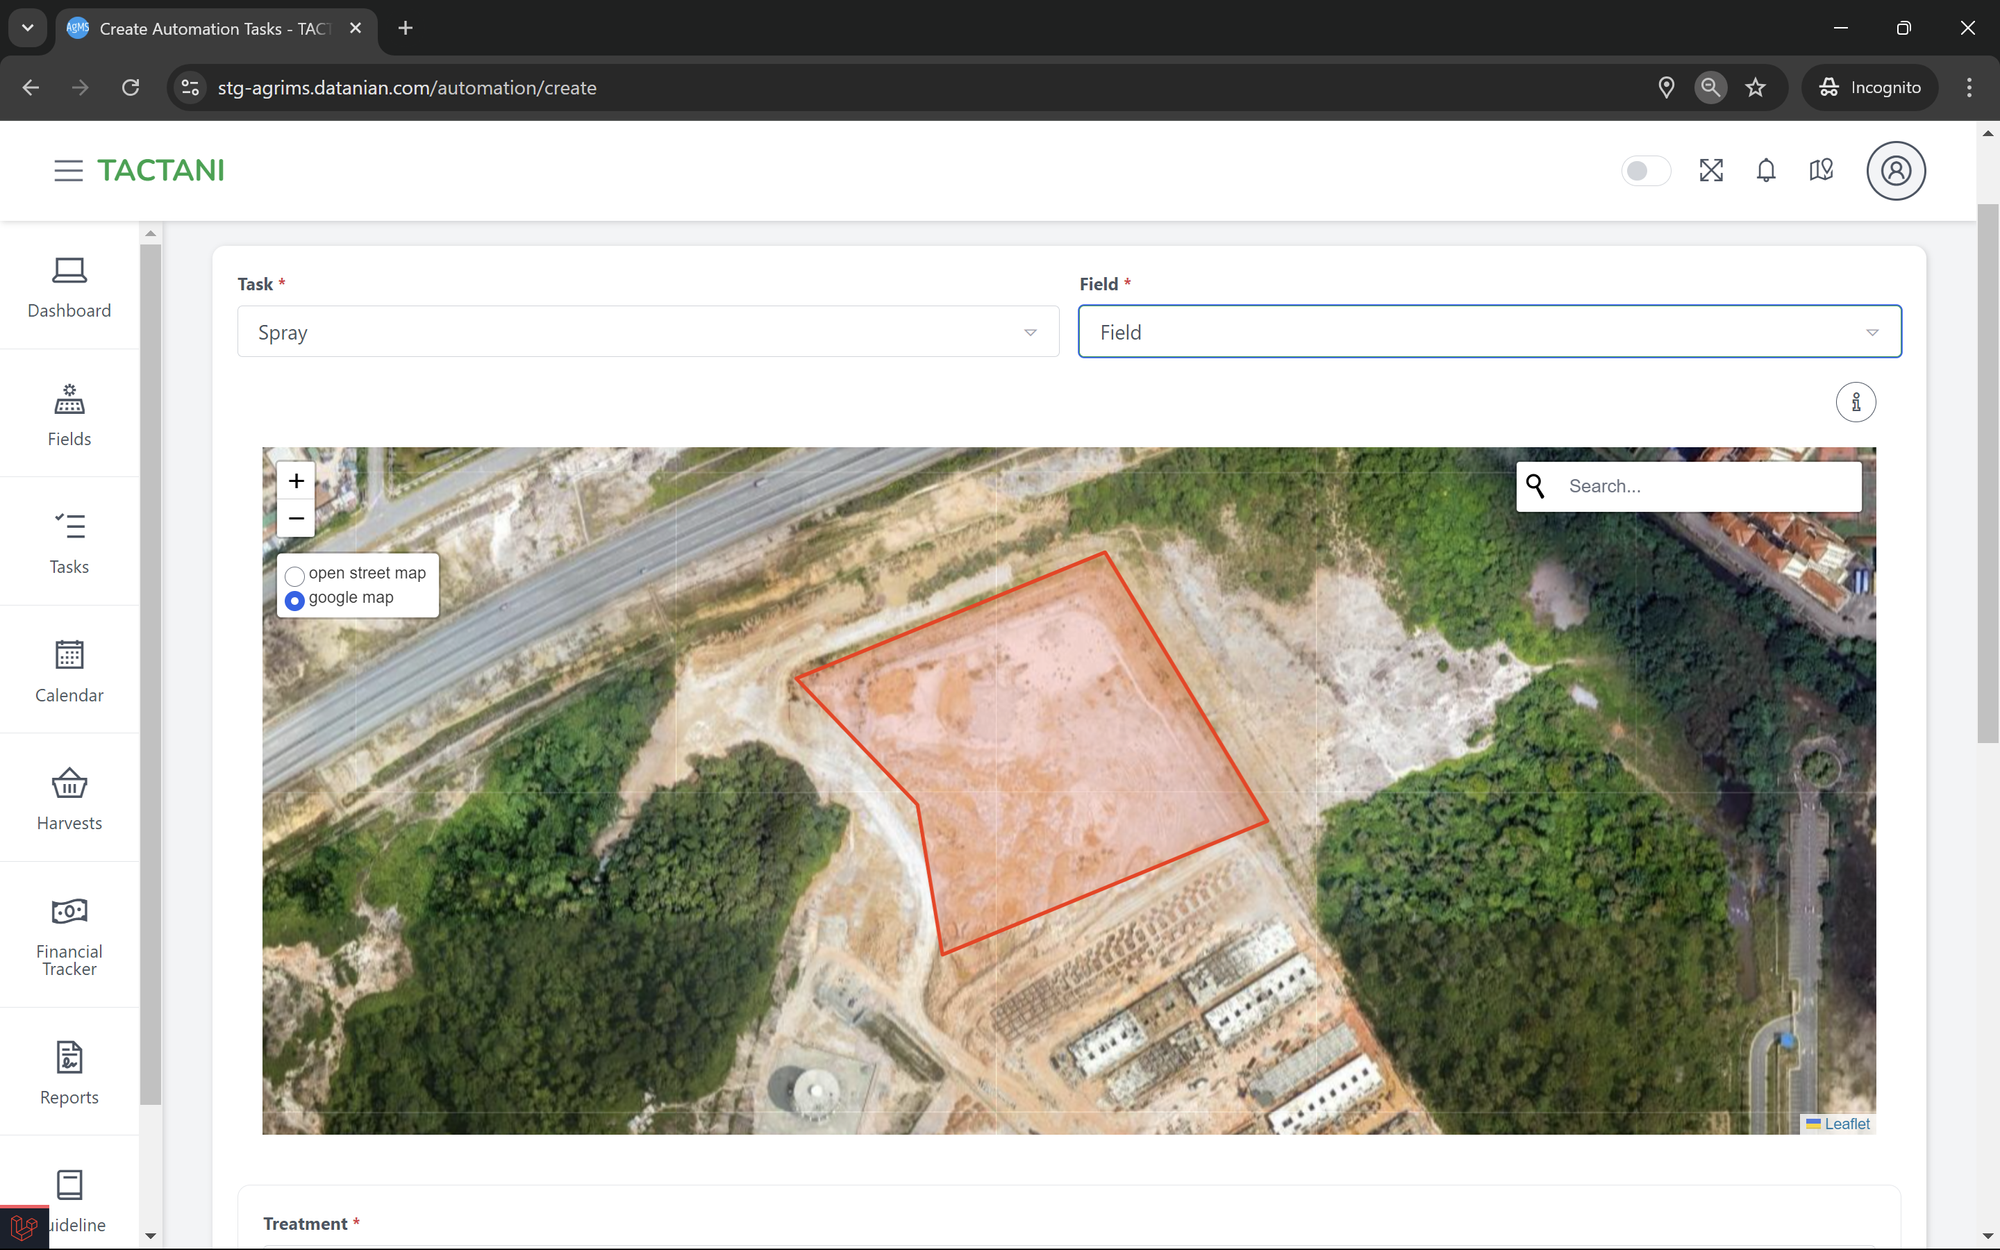
When creating an automation task in Tactani, the user first needs to select the type of task from a dropdown menu. After that, the user will choose the specific field where the task will be executed, also from a dropdown. Once the field is selected, a map will appear below, showing the location and parameters of the field.
Next, the user selects the treatment needed for the task. This is a dropdown field as well, but if the required treatment is not listed, the user can click Add New Treatment. A form will appear, asking for Product Name, Plant Category (dropdown), Application Rate, and Unit (dropdown). Once the form is filled, the user can click Create to add the new treatment or Cancel to stop the process.
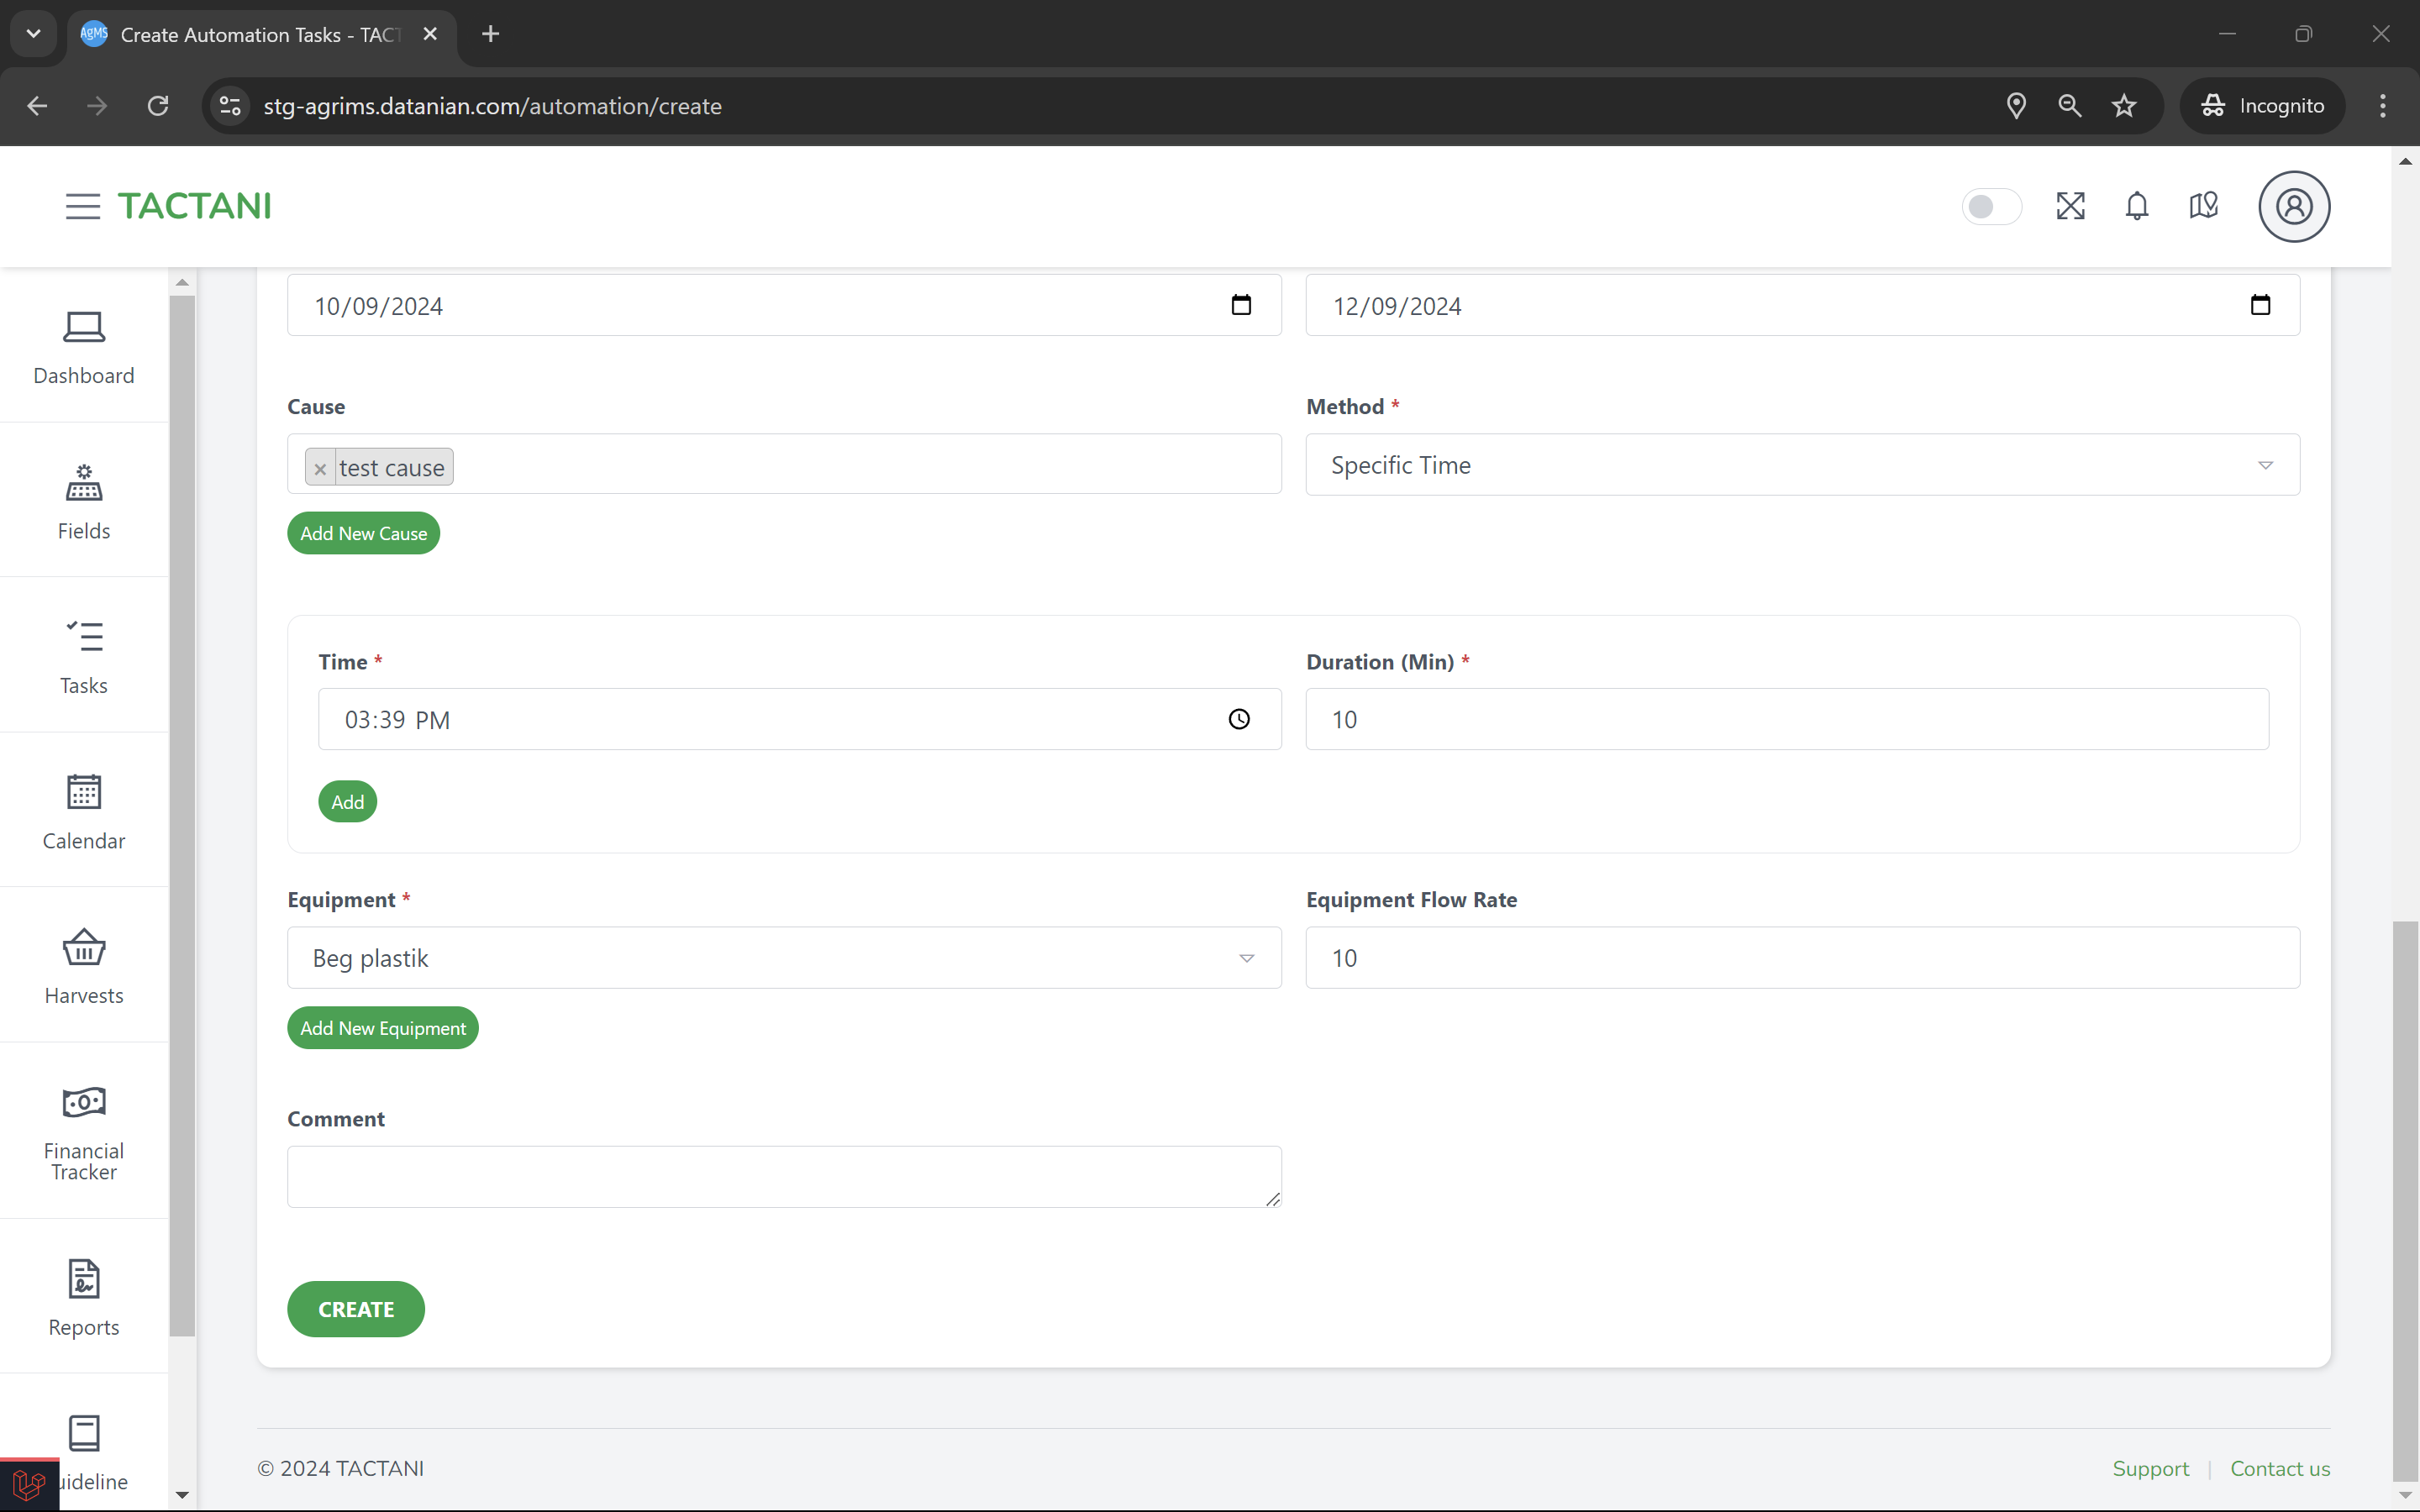
After choosing the treatment, the user will fill in the Start Date and End Date for the task. The next step is selecting the Cause, a dropdown input where users can choose more than one cause. If the cause needed doesn’t exist, users can add a new cause by clicking Add New Cause. This will bring up a form asking for the Cause Name, Type (dropdown), and Description. After filling in the fields, users can click Create to add the cause or Cancel to abort the process.
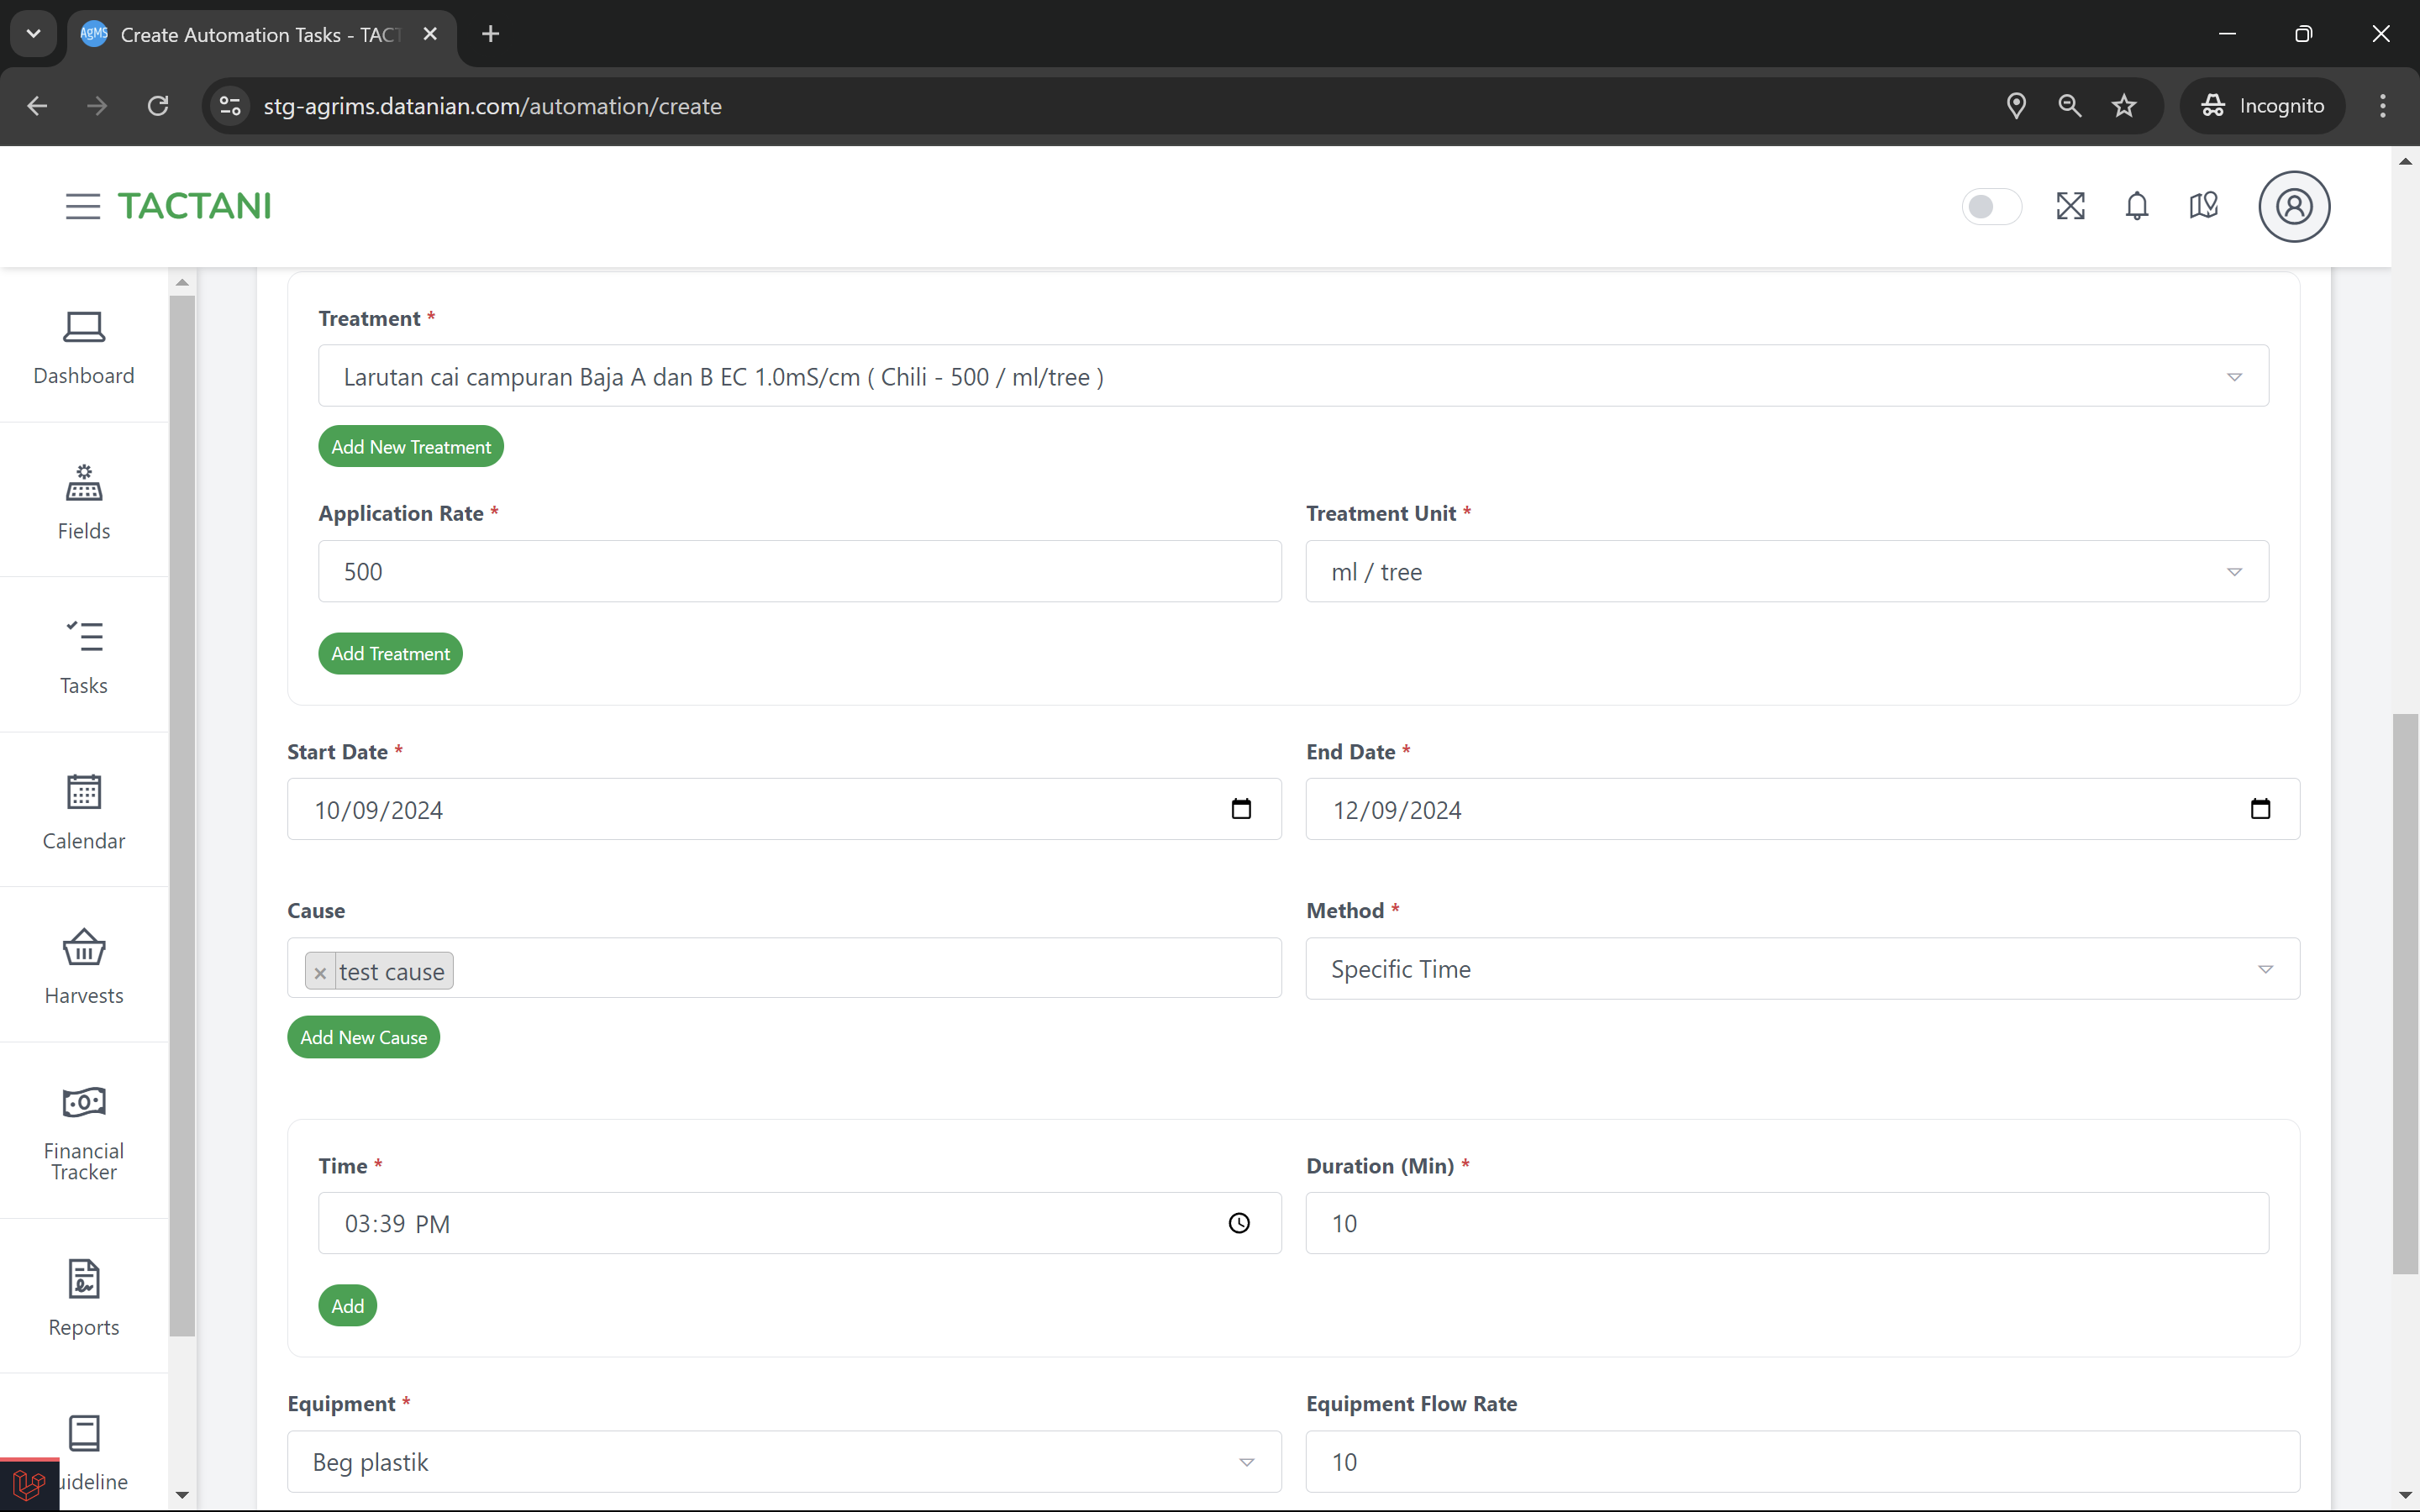
Following this, the user will choose a Method (dropdown) and then select Equipment from a dropdown list. If the required equipment is not available, users can add new equipment by clicking Add New Equipment. This will open a form requesting the Equipment Name and Type. After completing the form, click Create to add the equipment or Cancel to stop.
The next field to fill is the Equipment Flow Rate, followed by the Comments section. Once all the fields are completed, the user can click Create to finalize the automation task, which will then be displayed in the list of automation tasks.