Creating a Fields
To create a field in Tactani, you'll start by navigating to "Fields" in the left navigation bar. This will bring up a list of your existing fields. On the upper right side of the page, you'll see a "Create" button. Click it, and a form will appear for you to begin creating your new field.

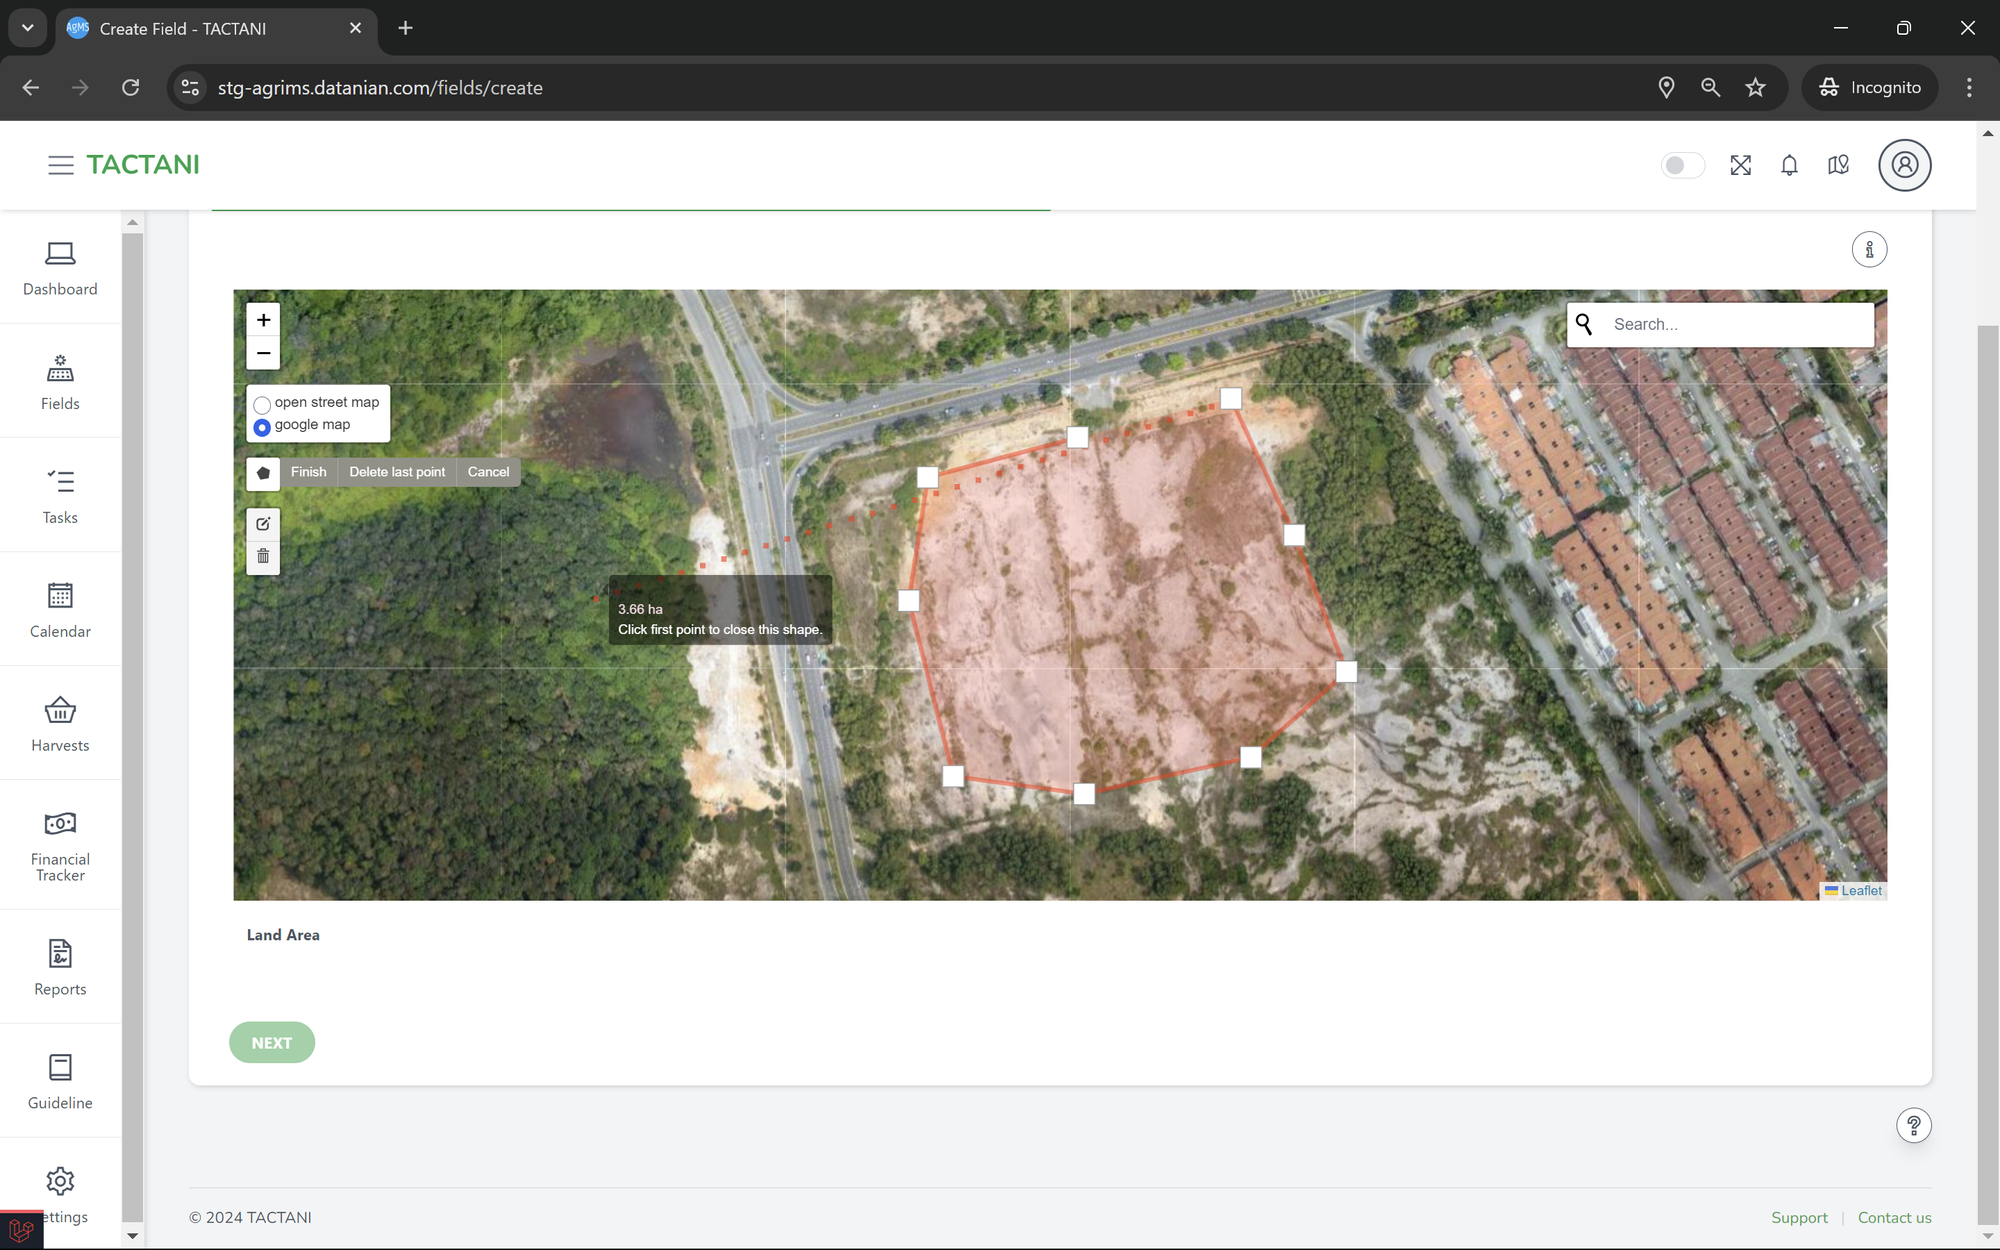
The first step is to map the location of your field. To do this, click on the "Draw a polygon" option on the provided map. Start mapping out your field by clicking on the map to set points that outline the area. Once you're done, click "Finish" beside the "Draw a polygon" option. If you make a mistake while mapping, you can use the "Delete last point" option to remove the last point you placed. If you want to cancel the field mapping altogether, a "Cancel" option is also available.
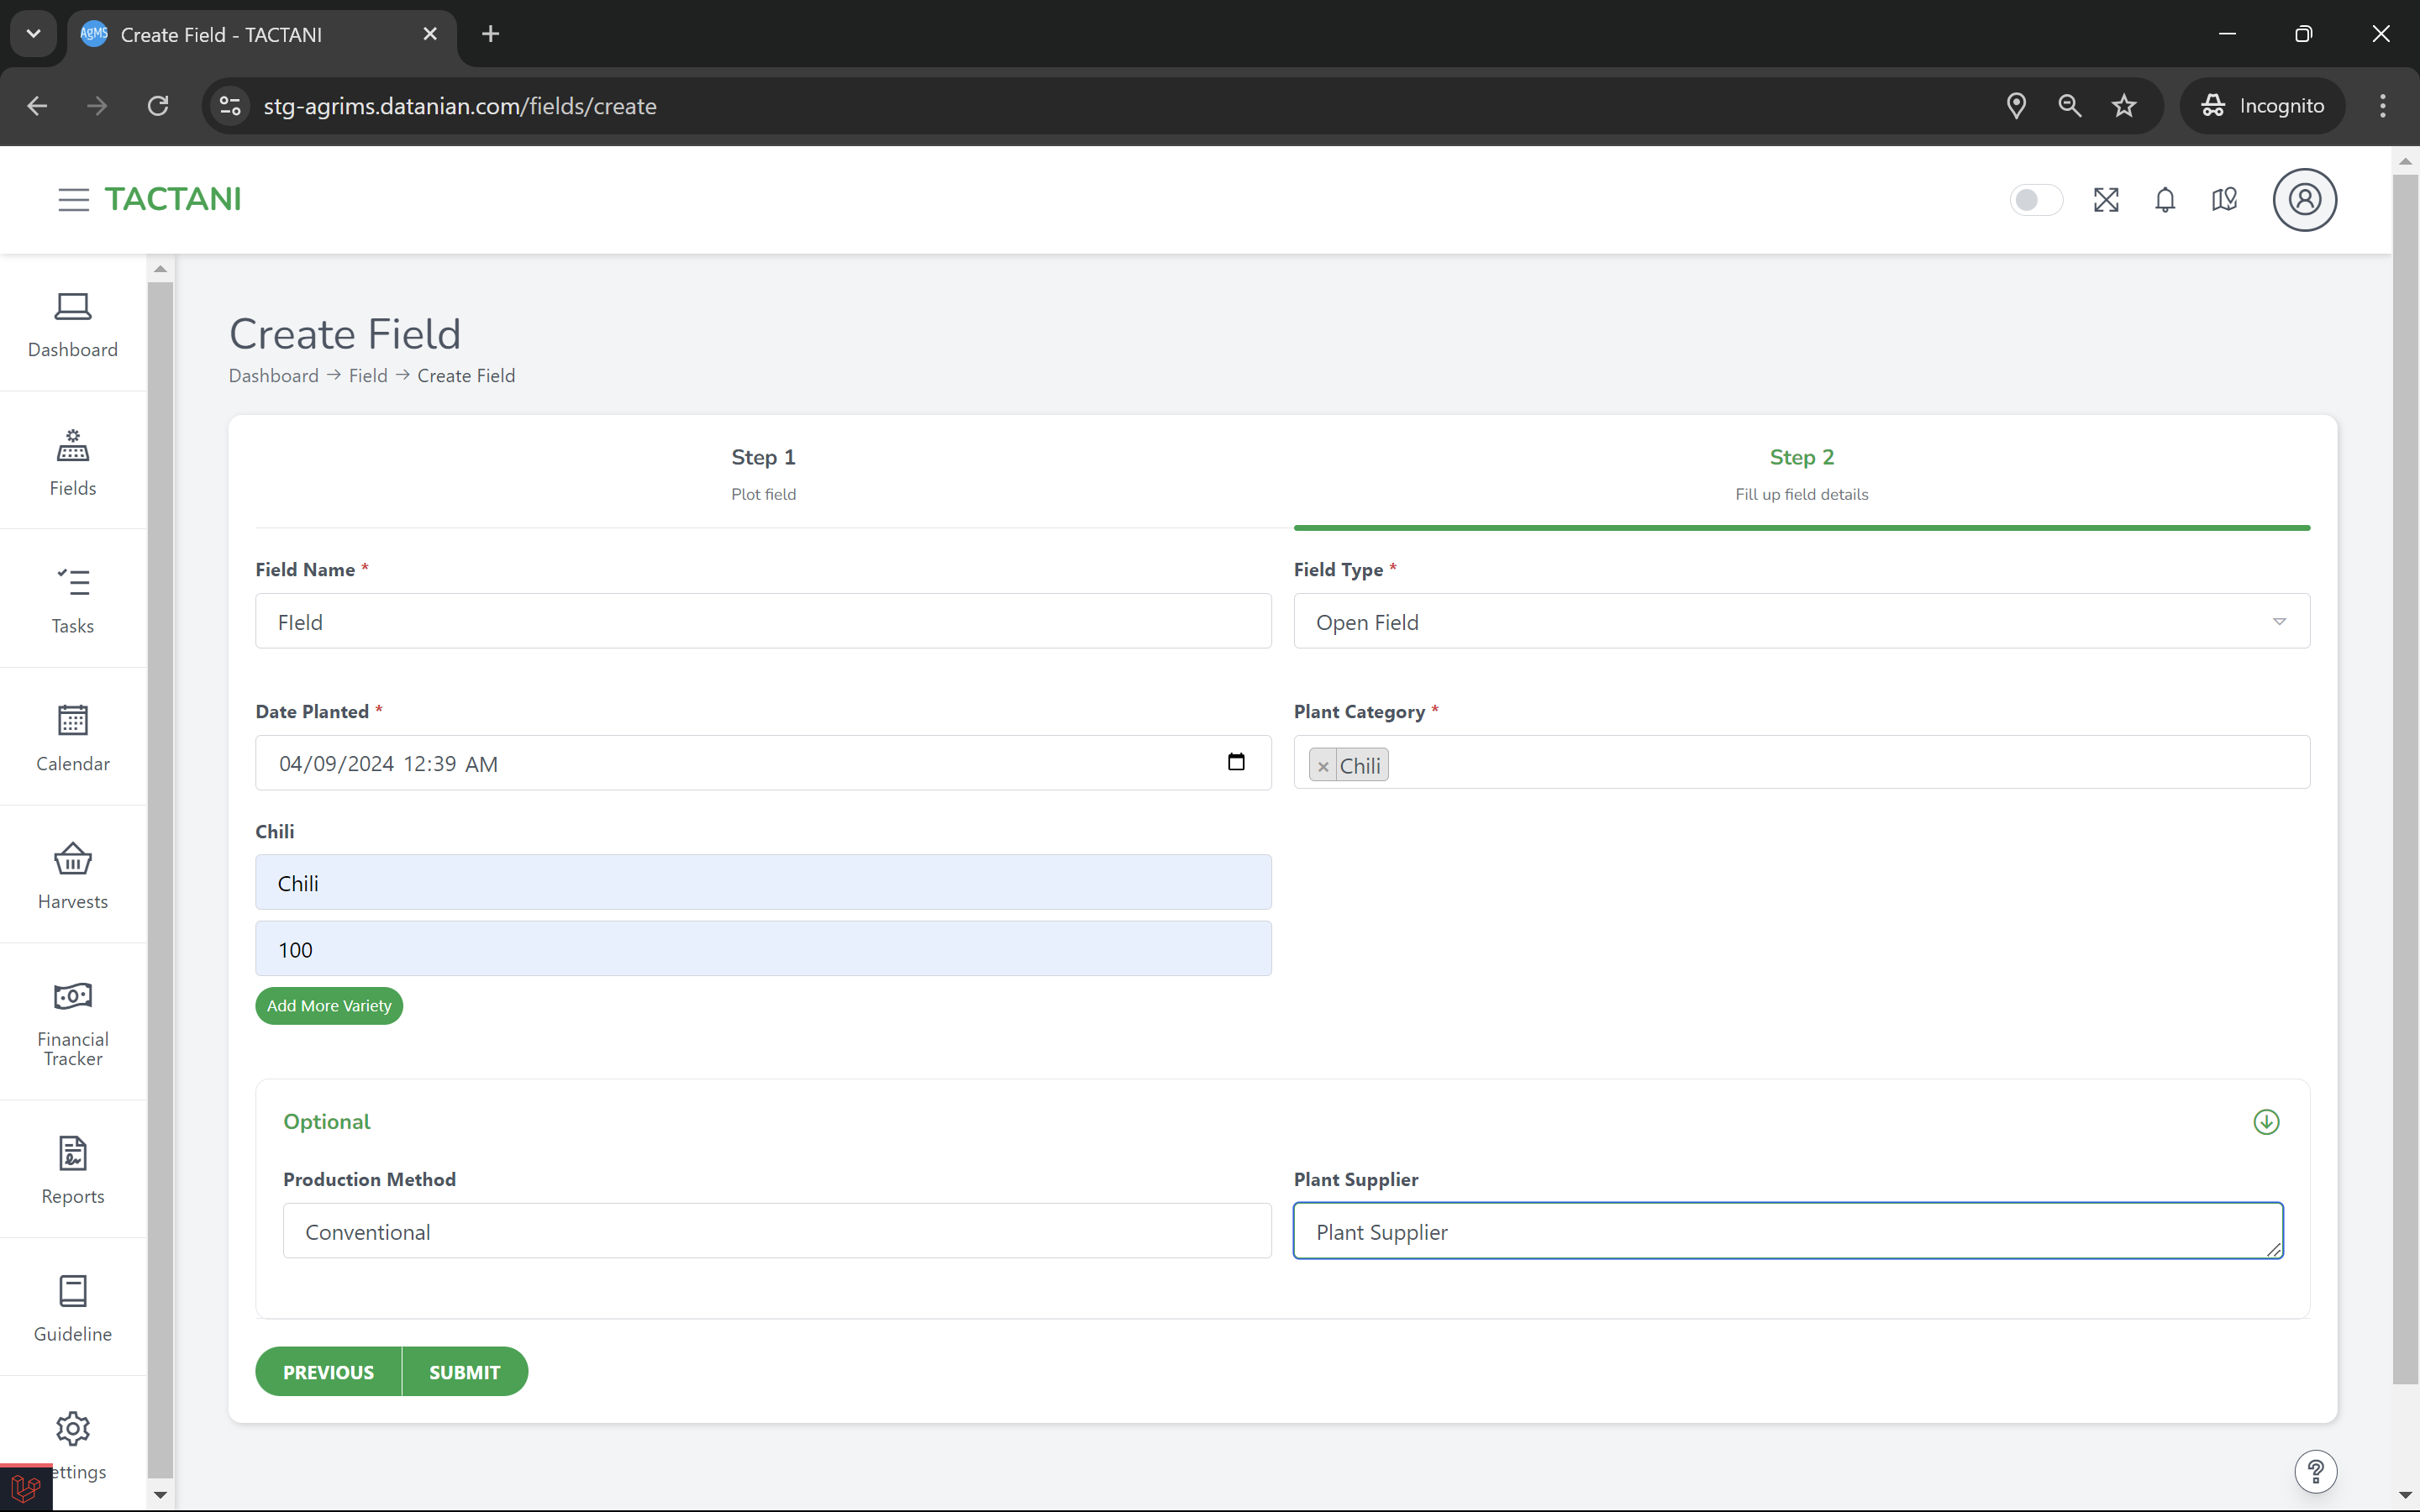
After mapping the field's location, you'll need to fill out a form with details about the field. This includes the field name, field type, date planted, and plant type. Depending on the field type you select, additional optional fields may appear. When entering the plant type, you'll also need to specify the variety of the plant and what percentage of the field it will occupy. If you want to add more than one variety under the same plant type, you can click the "Add More Variety" button, which will add another form below the one you've already filled out. Below the plant variety section, you'll find the optional form fields related to the field type.
If at any point you want to change the field's mapped location, you can go back to the mapping step. Once you've completed all the necessary input fields, click the "Submit" button to create the field. This will finalize the creation of your new field in Tactani.